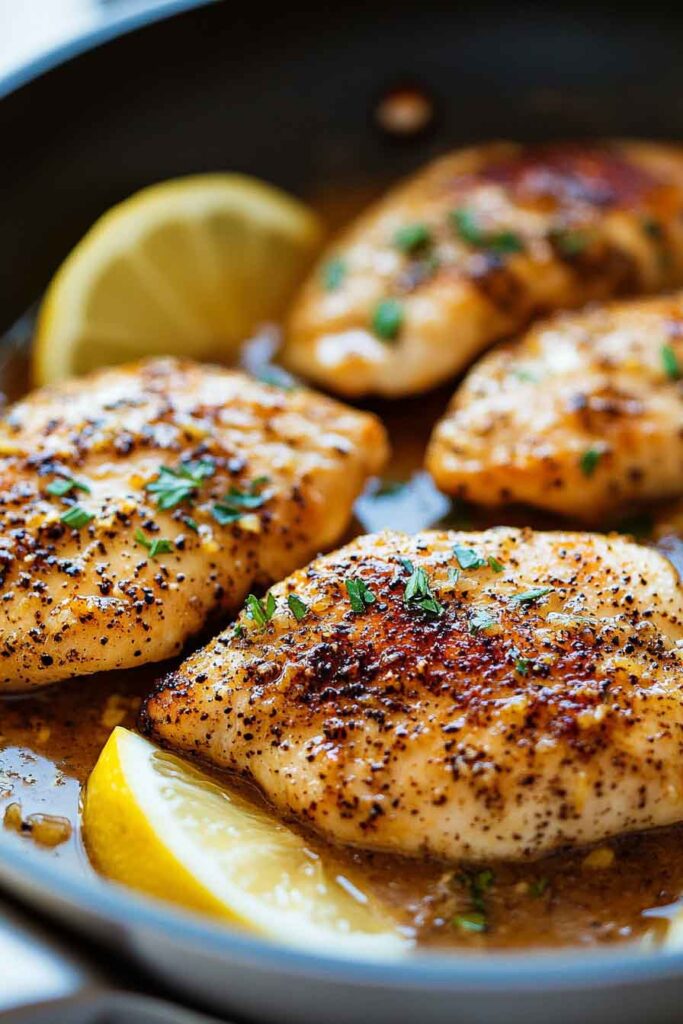
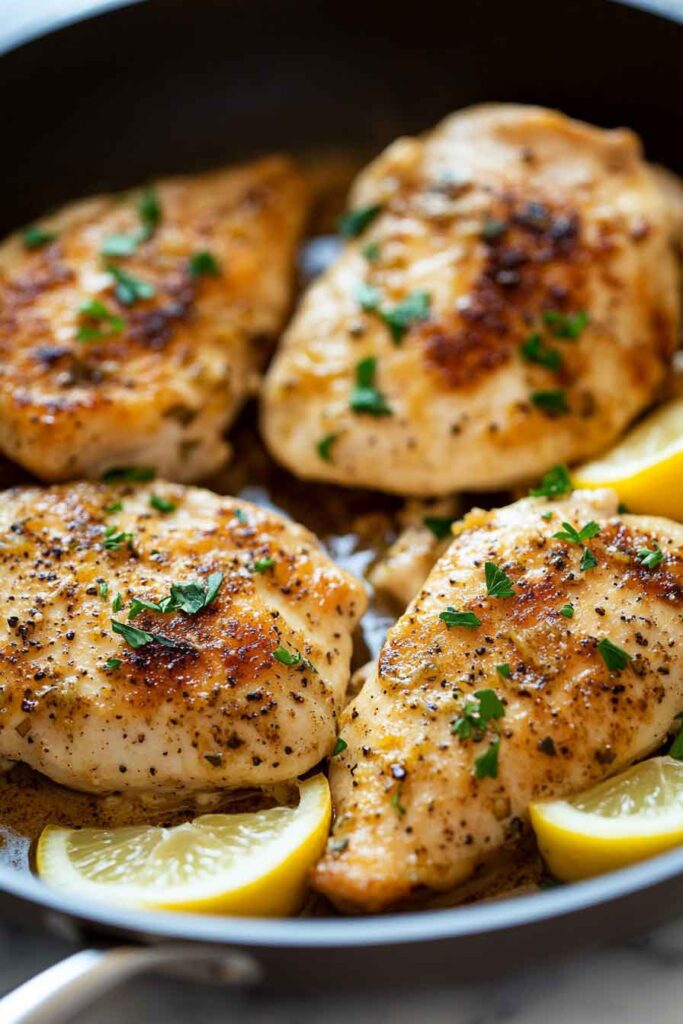
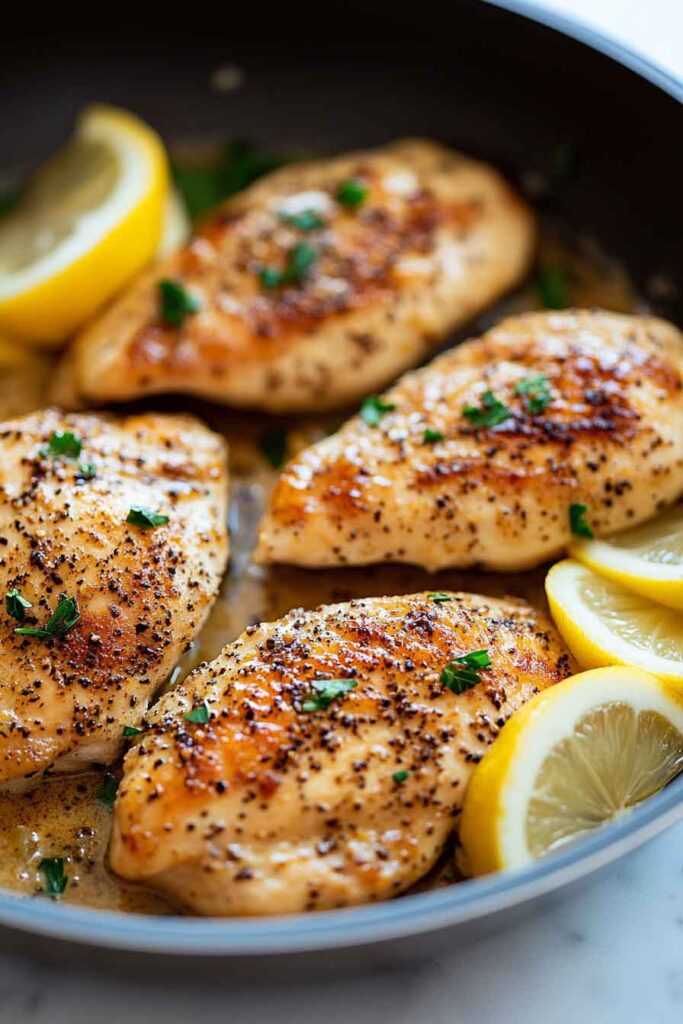
Okay, this lemon pepper chicken? It’s fresh, zesty, and full of bold, simple flavor. Crispy on the outside, juicy on the inside—and super easy to pull together.
I made it one night when I wanted something fast but not boring. Just grabbed some chicken, tossed it with lemon juice, cracked black pepper, and a little garlic. Threw it in a skillet, and in no time? Dinner was done.
That lemon gives it a bright kick, and the pepper adds just the right amount of heat. You can serve it with rice, salad, or roasted veggies—it works with everything.
If you’re looking for a no-fuss dinner that tastes like you really tried, this one’s for you. Let’s get cooking—you’re gonna love how fresh and flavorful it is.
Why You’ll Love This Recipe
- Naturally Bold Flavor: Fresh lemon juice, lemon zest, and cracked black pepper combine to brighten and sharpen the flavor profile without being overwhelming.
- Crispy, Not Greasy: Thanks to a panko-based breading and shallow pan-frying or oven baking, the texture is crisp but still light.
- Flexible Cooking Options: You can use the stovetop for a quick sear or the oven for a more hands-off approach with consistent browning.
- Balanced and Fresh: The pepper provides subtle heat, the lemon offers acidity, and the olive oil keeps everything moist and tender.
- Reliable for Meal Prep: Cools and stores well, maintaining both texture and flavor when reheated properly.
What You Need to Know Before You Start
Prep Time & Cook Time:
- Prep Time: 20 minutes
(Includes slicing chicken, setting up breading station, and prepping lemon oil) - Cook Time: 25–30 minutes
(Depending on the cooking method and thickness of cutlets) - Total Time: About 45–50 minutes
Servings:
This recipe yields enough for 4 full servings. You’ll get 4 lemon pepper chicken cutlets from 2 large breasts sliced in half. For a crowd, scale the recipe proportionally and work in batches to avoid overcrowding your pan or baking tray.
Difficulty Level:
Beginner to Intermediate.
No complicated techniques—just standard dredging, pan-searing or oven baking. Still, attention to detail (like even slicing and proper seasoning) is important for best results.
Required Kitchen Tools
To ensure even cooking and golden, crisp results, these tools are recommended:
- Cutting Board & Knife: For slicing the chicken and prepping lemons.
- Meat Mallet or Rolling Pin: To flatten cutlets for even thickness (aim for about ½ inch thick).
- 3 Shallow Bowls or Plates: For a standard dredging station (flour, lemon oil, breadcrumbs).
- Tongs or Fork: To handle the chicken while breading and cooking.
- Zester or Microplane Grater: Essential for removing the zest without the bitter white pith.
- Cast Iron Skillet or Heavy-Bottomed Pan: Retains heat well for even browning.
- Baking Sheet + Wire Rack: If baking, elevating the chicken helps maintain crisp texture.
- Instant-Read Thermometer: Optional, but ensures chicken is safely cooked to 165°F without drying it out.
Ingredients for the Lemon Pepper Chicken
This recipe focuses on using fresh, whole ingredients to create flavor without overpowering. Each element contributes to balance and depth.
For the Chicken:
- Chicken Breasts (2 large): Slice horizontally into 4 even cutlets. Thin, even pieces cook faster and stay juicier.
- Salt: Enhances the natural flavor of the chicken and balances acidity.
- Black Pepper (coarsely ground): Use freshly cracked black pepper or coarse grind for best impact. You’ll taste the pepper, not just heat.
- Garlic Powder: Provides subtle savory background without dominating.
- Paprika: Adds color and slight earthiness to the breading.
- Dried Parsley: Adds contrast and a hint of herbaceous aroma in the crust.
For the Lemon Oil Mixture:
- Olive Oil (3 tablespoons): Acts as the moisture-binding agent and flavor carrier. Use extra virgin for more depth.
- Lemon Zest (from 2 lemons): Carries the essential citrus oils. Zest first, then juice.
- Lemon Juice (2 tablespoons): Brings brightness and acidity. Fresh-squeezed only—bottled lacks the punch.
For the Breading:
- All-Purpose Flour (½ cup): First dredge layer that helps the lemon oil stick.
- Panko Breadcrumbs (¼ cup): Provides crispness while letting the lemon and pepper flavors shine. You can substitute with plain or Italian breadcrumbs, but the texture will be finer and less crisp.
Variations for Lemon Pepper Chicken
This recipe is flexible enough to adapt to your preferences or what you have on hand. Here are a few tested variations:
- Add Fresh Herbs: Mix chopped rosemary, thyme, or parsley into the lemon oil or sprinkle over the chicken right after cooking for a fresh finish.
- Make It Spicier: Add a pinch of cayenne pepper or crushed red pepper flakes to the breadcrumb mixture for subtle heat.
- Use Buttermilk Instead of Lemon Oil: For a tangy, tenderizing marinade, soak the chicken in buttermilk with lemon zest and black pepper for 2–4 hours before dredging.
- Use Chicken Thighs: Boneless, skinless thighs work just as well—cook slightly longer to reach internal temp.
- Bake with Lemon Slices: Lay thin lemon slices over each piece before baking for an extra citrus boost.
- Make It Gluten-Free: Use gluten-free panko and a gluten-free flour blend.
How to Make Lemon Pepper Chicken: Step-by-Step Instructions
This section guides you through each phase, from prep to plating, with in-depth details to ensure success.
Step 1: Prepare the Chicken
- Trim and Slice:
Place chicken breasts on a cutting board. Hold one hand flat on top and use a sharp knife to slice horizontally through the center, creating two thinner pieces. Repeat for the second breast to yield 4 cutlets. - Pound Evenly (Optional but Recommended):
Place the cutlets between two sheets of plastic wrap or parchment. Gently pound with a meat mallet or rolling pin until uniformly ½ inch thick. This step ensures even cooking and tenderness. - Season Lightly:
Sprinkle each piece with a small pinch of kosher salt and a light dusting of garlic powder to start layering the flavor.
Step 2: Set Up a Dredging Station
Arrange three shallow dishes:
- Flour Bowl: Mix flour with ½ teaspoon salt and ¼ teaspoon garlic powder. This step helps the lemon oil cling to the chicken.
- Lemon Oil Bowl: In a second bowl, whisk together olive oil, lemon zest, lemon juice, and a few cracks of black pepper (about 1 teaspoon or to taste).
- Breadcrumb Bowl: Combine panko, more black pepper (up to 1 tsp for bold flavor), a pinch of paprika, and dried parsley.
Step 3: Bread the Chicken
- Dredge in Flour: Lightly coat each cutlet in the seasoned flour. Shake off any excess.
- Dip in Lemon Oil Mixture: Place the floured chicken into the lemon oil, flipping to coat thoroughly. Let excess drip off.
- Press into Panko Mixture: Firmly press each cutlet into the breadcrumb bowl so the coating adheres evenly. Set aside on a clean plate.
Step 4: Cook the Chicken
Stovetop Method (Best for Crisp Texture):
- Preheat a Skillet: Heat 2–3 tablespoons olive oil over medium heat until shimmering but not smoking.
- Sear the Chicken: Place the breaded cutlets in the skillet. Cook for 3–4 minutes on the first side, or until deeply golden.
- Flip and Finish: Turn and cook for another 3–5 minutes, pressing down gently if needed, until both sides are golden and the center reaches 165°F.
- Rest: Transfer to a plate and let rest for 5 minutes before slicing or serving.
Oven-Baked Method (Cleaner and Hands-Off):
- Preheat Oven: 400°F (200°C). Line a baking sheet with foil and place a wire rack on top.
- Prepare the Rack: Spray the wire rack lightly with cooking spray or brush with oil.
- Arrange and Bake: Place breaded cutlets on the rack and bake for 20–25 minutes, flipping halfway through. Check for doneness at 165°F internal temperature.
- Rest: Let the chicken rest 5 minutes before serving to keep the juices locked in.
How to Serve Lemon Pepper Chicken
This dish is versatile and pairs beautifully with fresh, creamy, or starchy sides. Here are some pairing ideas:
- With Rice or Quinoa: Serve over herbed rice, lemon rice, or fluffy quinoa with steamed vegetables.
- On a Salad: Slice and layer onto a bed of mixed greens, cherry tomatoes, avocado, and cucumber with a lemon vinaigrette.
- With Pasta: Toss with cooked angel hair or orzo and a drizzle of olive oil and more lemon juice.
- As a Sandwich or Wrap: Place in a warm pita or flatbread with tzatziki, cucumbers, and red onion.
- Next to Roasted Veggies: Especially good with green beans, asparagus, or roasted carrots.
Storing Lemon Pepper Chicken
- Refrigerator: Store cooled, cooked chicken in an airtight container for up to 4 days.
- Freezer: Wrap each piece in parchment, then foil, and place in a freezer bag. Freeze for up to 2 months. Thaw overnight in the fridge.
- To Reheat: Warm gently in a skillet over low heat or in the oven at 300°F until heated through. Avoid the microwave to preserve crispiness.
Tips and Tricks for Success
- Use Fresh Lemons: Bottled lemon juice lacks the brightness and aroma of fresh.
- Don’t Skip the Zest: It holds essential oils that create the most flavor.
- Even Thickness Matters: Flattening the chicken ensures quick, even cooking and reduces drying.
- Use Coarse Pepper: The signature peppery bite depends on freshly cracked or coarse-ground black pepper.
- Don’t Overcrowd the Pan: For stovetop, cook in batches to avoid steaming the coating.
Nutrition
| Nutrient | Per Serving (1 cutlet) |
|---|---|
| Calories | 280 |
| Protein | 27g |
| Total Fat | 14g |
| Saturated Fat | 2g |
| Carbohydrates | 11g |
| Fiber | 1g |
| Sugar | <1g |
| Sodium | 450mg |
| Cholesterol | 70mg |
Note: Values may vary based on specific brands and substitutions.
Lemon Pepper Chicken (Stovetop OR Oven-Baked)
Course: Uncategorized4
cutlets20
minutes25
minutes280
kcalIngredients
For the Chicken:
2 large boneless, skinless chicken breasts (sliced into 4 thin cutlets)
½ tsp kosher salt
½ tsp garlic powderFor the Lemon Oil:
3 tbsp olive oil
Zest of 2 lemons
2 tbsp fresh lemon juice
1 tsp coarsely ground black pepperFor the Breading:
½ cup all-purpose flour
¼ cup panko breadcrumbs
½ tsp garlic powder
¼ tsp paprika
½ tsp dried parsley
½ tsp kosher salt
Extra black pepper to taste
Directions
- Prep Chicken: Slice chicken breasts in half horizontally to create cutlets. Pound to even ½-inch thickness if needed.
- Set up 3 bowls:
Bowl 1: Flour + garlic powder + salt
Bowl 2: Lemon oil mixture (olive oil + zest + juice + pepper)
Bowl 3: Breadcrumbs + parsley + paprika + extra pepper - Bread Chicken: Dredge chicken in flour, coat in lemon oil, press into breadcrumb mix. Set aside.
- Stovetop:
Heat oil in a skillet over medium heat.
Cook chicken 3–4 min per side until golden and internal temp hits 165°F. Rest 5 min. - Or Oven:
Preheat oven to 400°F.
Place chicken on a greased wire rack over a baking sheet.
Bake 20–25 min, flipping halfway. Let rest before serving.
Lemon Pepper Chicken FAQs
Q: Can I make this ahead of time?
Yes, bread the chicken and refrigerate for up to 8 hours before cooking. Cook just before serving for best texture.
Q: Can I use lemon pepper seasoning instead of fresh ingredients?
You can, but the flavor won’t be as bright or fresh. If using, reduce the added salt.
Q: Is this recipe gluten-free?
No, but you can substitute with gluten-free flour and breadcrumbs.
Q: Can I grill this chicken?
Yes—skip the breading and marinate in the lemon oil mix. Grill 5–6 minutes per side.
Conclusion
Lemon Pepper Chicken is one of those go-to dishes you’ll keep returning to. It’s quick, adaptable, and built on ingredients you likely have on hand. Whether pan-seared or oven-baked, it offers the perfect balance of brightness, spice, and crunch.
With clear steps and reliable techniques, this recipe works well for first-time cooks and experienced home chefs alike. Once you’ve mastered the base, there’s plenty of room to adjust to your own taste or seasonal ingredients.