This bread is soft, crusty, and super simple. No kneading, no fancy tools—just mix, let it rise, and bake. It’s the easiest way to get homemade bread on the table.
I tried it on a busy day, and wow—it turned out perfect. The crust is golden and crisp, and the inside is fluffy and light. Plus, the house smells amazing.
It’s fresh, warm, and perfect for sandwiches or just with butter. You’ll never go back to store-bought after this. Trust me, it’s so worth it.
Let’s bake some easy bread! This no-knead recipe is quick, simple, and totally foolproof. Grab a bowl—your bread’s waiting!
Why You’ll Love This Recipe
- Effortless Technique: This recipe eliminates the need for kneading, which means less effort and no special equipment. The long fermentation builds the gluten network naturally.
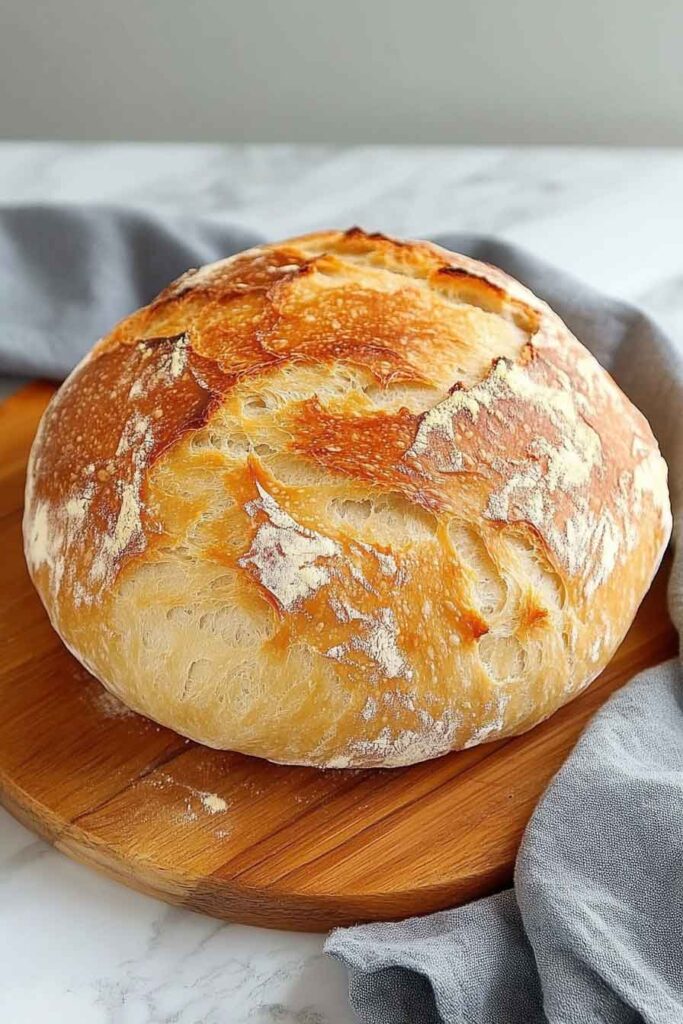
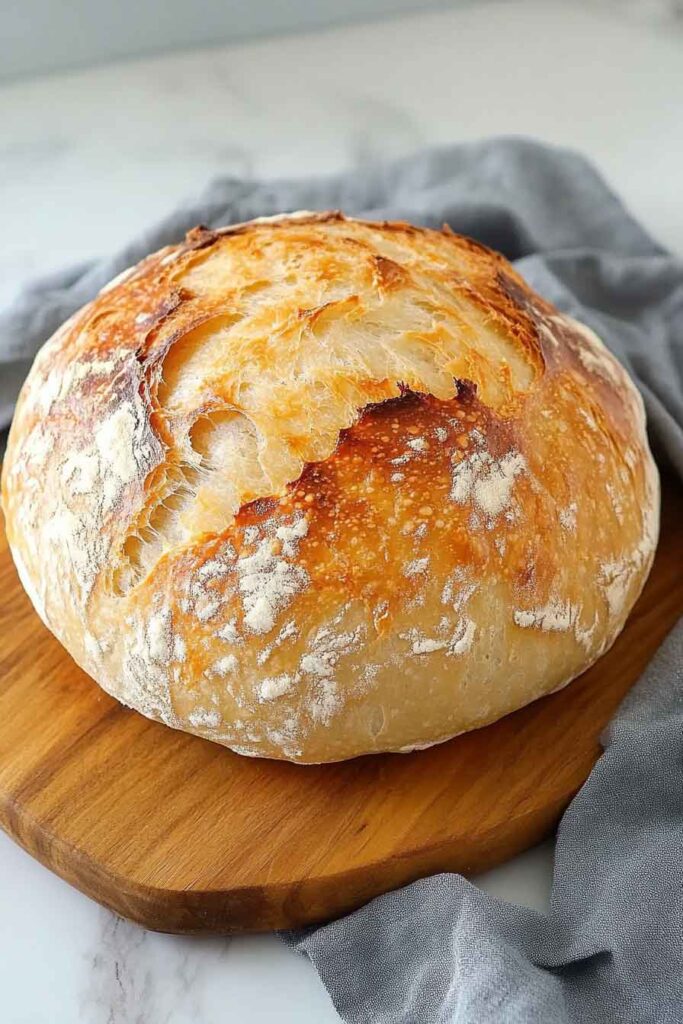
- Authentic Artisan Texture: You’ll achieve a golden-brown, crackling crust and a soft, open crumb reminiscent of artisan loaves from a bakery.
- Minimal Ingredients: With just four pantry staples—flour, water, yeast, and salt—you can create a loaf full of complex flavor.
- Time-Enhanced Flavor: The extended fermentation not only develops gluten but also deepens the bread’s flavor with mild sourdough-like notes.
- Versatile Serving Options: Enjoy it sliced for sandwiches, dipped in soups, or simply toasted with butter and jam.
What You Need to Know Before You Start
Prep Time & Cook Time:
- Prep Time: 5 minutes of active mixing (plus 12 to 18 hours rise time for maximum flavor and structure)
- Cook Time: 40-45 minutes, depending on your oven and the size of your Dutch oven.
- Total Time: 13-19 hours (mostly hands-off).
Servings:
This recipe yields one medium-sized loaf, enough to serve 6-8 people. For a party or meal prep, you can easily double the quantities and bake two loaves side-by-side.
Difficulty:
Beginner-friendly but satisfying for seasoned bakers who want a low-effort, high-reward loaf.
Required Kitchen Tools
- Large Mixing Bowl: For combining your ingredients and allowing the dough to rise.
- Wooden Spoon or Sturdy Spatula: For mixing the dough. No kneading means no stand mixer required.
- Plastic Wrap or Damp Kitchen Towel: To cover the bowl during fermentation, keeping the dough moist.
- Dutch Oven or Heavy Oven-Safe Pot with Lid: Essential for creating the steam environment that gives the bread its signature crust.
- Parchment Paper: Helps transfer the sticky dough into the Dutch oven and makes cleanup easier.
- Oven Mitts or Thick Towel: To safely handle the hot Dutch oven.
- Cooling Rack: Allows the bread to cool evenly, preventing a soggy bottom.
Ingredients for the No-Knead Bread Dough
Here’s what you’ll need to make this bread (with a brief explanation of each ingredient’s role):
- 3 Cups (360g) All-Purpose Flour: This forms the structure of the bread. All-purpose flour creates a balanced texture, while bread flour (if substituted) will yield a chewier crumb.
- 1 1/4 Teaspoons Kosher Salt: Enhances the natural flavor of the bread and balances the yeast’s activity.
- 1/4 Teaspoon Instant Yeast: A minimal amount is used to allow for slow fermentation. Instant yeast is ideal because it doesn’t require proofing.
- 1 1/2 Cups (360ml) Warm Water (100–110°F): Hydrates the dough and activates the yeast. The high water content creates a sticky, shaggy dough, which is key to the bread’s airy structure.
Variations for No-Knead Bread
- Herb-Infused: Mix in a tablespoon of chopped rosemary or thyme for aromatic depth.
- Whole Wheat or Multigrain: Substitute up to half the all-purpose flour with whole wheat or spelt for a heartier loaf.
- Seed-Crusted: Roll the shaped dough in sesame, poppy, or sunflower seeds before baking for added crunch and flavor.
- Cheese or Olive Additions: Fold in 1/2 cup of shredded sharp cheddar or chopped Kalamata olives for a savory twist.
- Sourdough Starter Variation: For a more complex flavor, replace the instant yeast with 1/4 cup active sourdough starter and adjust the water and flour slightly.
How to Make No-Knead Bread: Step-by-Step Instructions
1. Mix the Dough
In a large mixing bowl, combine the flour, salt, and instant yeast. Slowly pour in the warm water while stirring with a wooden spoon or sturdy spatula. The dough will look shaggy and sticky—that’s exactly what you want. There’s no need to knead it; the long fermentation will develop the gluten naturally.
2. Cover and Let It Rise
Cover the bowl tightly with plastic wrap or a clean kitchen towel. Let the dough sit at room temperature (ideally around 70°F or 21°C) for at least 12 to 18 hours. This long, slow rise allows the yeast to work slowly, developing flavor and structure.
3. Preheat the Oven and Dutch Oven
About 30 minutes before you’re ready to bake, place your Dutch oven (with the lid) in the oven and preheat it to 450°F (230°C). The preheated pot helps create the steam needed for a crisp crust.
4. Shape the Dough
While the oven preheats, gently turn the dough out onto a well-floured surface. Using floured hands, shape it into a round loaf. Handle the dough carefully to preserve the air bubbles that formed during fermentation. Let it rest for 20-30 minutes on a piece of parchment paper.
5. Bake the Bread
Once the oven and Dutch oven are fully preheated, carefully remove the pot using oven mitts. Lift the dough with the parchment paper and place it into the hot pot. Cover with the lid and bake for 30 minutes. Then, remove the lid and bake for an additional 10-15 minutes, or until the crust is deep golden brown.
6. Cool the Bread
Transfer the baked loaf to a wire rack and let it cool for at least an hour before slicing. This allows the crumb to set and prevents it from becoming gummy.
Serving and Presentation
- Rustic Loaf: Slice thick and serve with soups, stews, or as a side for dinner.
- Toasts: Use for breakfast with butter, jam, or avocado spread.
- Sandwiches: Great for grilled cheese, deli sandwiches, or paninis.
- Appetizer Platters: Pair with cheeses, olives, and dips for an elegant starter.

Storing No-Knead Bread
- At Room Temperature: Store the cooled loaf in a paper bag or wrapped in a clean kitchen towel for up to 2 days. Avoid plastic bags, which can make the crust soft.
- Freezing: Wrap the cooled loaf in plastic wrap and foil, then freeze for up to 3 months. Thaw at room temperature and reheat in the oven to refresh the crust.
- Reheating: To revive the crust, reheat the loaf in a 350°F (175°C) oven for about 10 minutes.
Tips and Tricks for Success
- Use a Scale: Weigh your flour and water for accuracy and consistency.
- High Hydration is Key: The dough should be wet and sticky—don’t add extra flour.
- Don’t Rush the Rise: The long fermentation is crucial for flavor and texture. Plan ahead.
- Preheat Thoroughly: A hot Dutch oven ensures a crispy, well-risen loaf.
- Let it Cool Completely: Slicing too early releases steam, leading to a gummy texture.
Nutrition (per slice, based on 8 slices)
| Nutrient | Amount |
|---|---|
| Calories | 160 |
| Total Fat | 0.5g |
| Saturated Fat | 0g |
| Carbohydrates | 33g |
| Fiber | 1g |
| Sugars | 0g |
| Protein | 5g |
| Sodium | 290mg |
Quick and Easy No-Knead Bread
Course: Uncategorized1
medium loaf5
minutes40
minutes160
kcal12-18
hourIngredients
3 cups (360g) all-purpose flour (or bread flour for chewier texture)
1 1/4 teaspoons kosher salt
1/4 teaspoon instant yeast
1 1/2 cups (360ml) warm water (100–110°F)
Directions
- Mix Dry Ingredients: In a large bowl, whisk together flour, salt, and yeast.
- Add Water: Pour in warm water, stirring with a spoon until a sticky dough forms. No kneading required.
- Ferment: Cover bowl with plastic wrap or towel. Let sit at room temperature for 12-18 hours.
- Preheat Oven: Place Dutch oven with lid inside oven and preheat to 450°F (230°C).
- Shape Dough: Turn dough onto floured surface, shape into a ball. Rest on parchment for 20-30 minutes.
- Bake: Transfer dough with parchment into preheated Dutch oven. Cover and bake 30 minutes. Uncover and bake 10-15 more minutes until golden brown.
- Cool: Let bread cool on a wire rack at least 1 hour before slicing.
FAQs of Quick and Easy No-Knead Bread
Can I use active dry yeast instead of instant?
Yes, but dissolve it in the warm water first and allow 10 minutes for it to activate.
Can I bake without a Dutch oven?
Yes, but you’ll need a heavy oven-safe pot with a lid or even a cast iron pan. The crust may not be as crisp without the steam.
Why is my dough so sticky?
That’s normal for high-hydration dough. Resist the urge to add more flour—it’s the secret to a light, airy crumb.
Can I speed up the rise?
You can shorten it to 4-6 hours by using more yeast (about 1/2 teaspoon) and keeping the dough in a warmer spot, but the flavor won’t be as developed.
Conclusion
This Quick and Easy No Knead Bread is a staple for any home baker—whether you’re a seasoned pro or just dipping your toes into bread-making. It delivers a satisfying crunch, a soft, airy crumb, and deep flavor with minimal effort. With just a few pantry staples and a little patience, you can bake a loaf that rivals your favorite bakery’s.