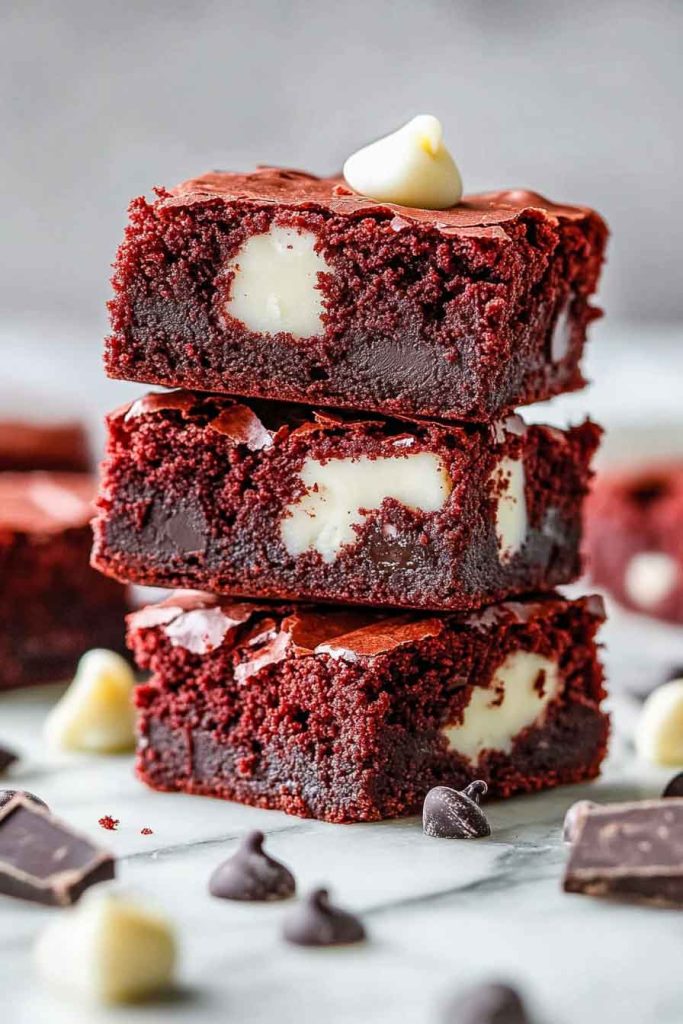
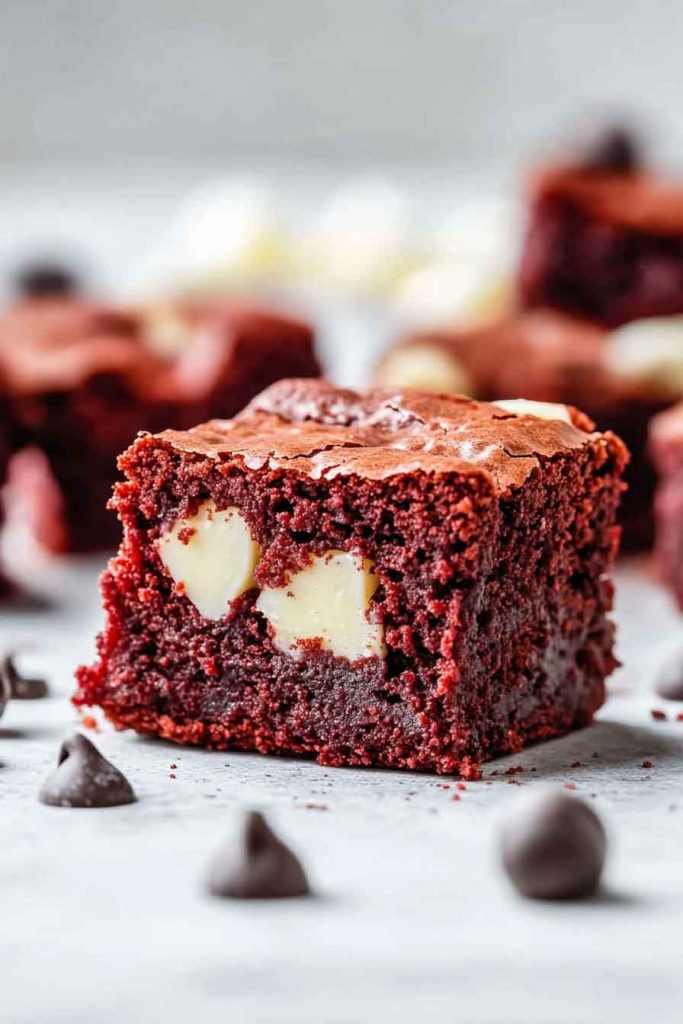
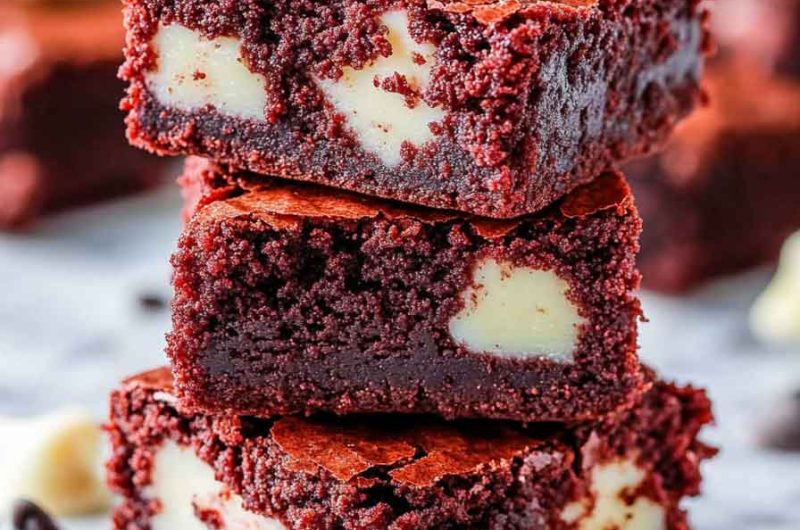
Red Velvet Brownies deliver a stunning, fudgy twist on the classic brownie with a rich cocoa flavor and gorgeous red color. These brownies combine the best of both worlds: the dense, chocolatey texture of a brownie with the subtle tang and vibrant appearance of red velvet cake. Perfect for holidays, celebrations, or whenever you want to impress.
Why You’ll Love This Recipe
- Eye-Catching: The bright red color makes these brownies stand out at any gathering.
- Rich and Fudgy: Dense, moist texture with deep chocolate flavor.
- Simple to Make: Uses basic pantry ingredients you likely already have.
- Crowd-Pleaser: Appeals to both brownie lovers and red velvet fans.
- Versatile: Perfect for parties, potlucks, or gift-giving.
What You Need to Know Before You Start
Prep Time & Cook Time:
- Prep Time: 15 minutes
- Cook Time: 25 minutes
- Total Time: 40 minutes
Servings: This recipe makes 16 brownies when cut into squares. Double the batch if you need more for a larger crowd.
Difficulty: Easy. These brownies are beginner-friendly and require minimal mixing.
Required Kitchen Tools
- 9×9-inch baking pan
- Mixing bowls (medium and large)
- Whisk
- Rubber spatula
- Parchment paper or cooking spray
- Measuring cups and spoons
- Toothpick (for testing doneness)
Ingredients for Red Velvet Brownies
These fudgy brownies use simple ingredients that create a beautiful, rich dessert. The combination of cocoa powder and red food coloring gives them their signature look, while white chocolate chips add sweet contrast. Here’s what you’ll need:
- Unsalted Butter (1/2 cup): Provides moisture and rich flavor.
- Unsweetened Cocoa Powder (1/4 cup): Adds chocolate depth without overwhelming sweetness.
- Granulated Sugar (1 cup): Sweetens the brownies and creates the fudgy texture.
- Eggs (2 large): Bind the ingredients and add structure.
- Vanilla Extract (1 teaspoon): Enhances the overall flavor.
- White Vinegar (1 teaspoon): Reacts with cocoa for the classic red velvet tang.
- All-Purpose Flour (3/4 cup): Gives the brownies structure.
- Table Salt (1/4 teaspoon): Balances sweetness and enhances flavors.
- Wilton Red Food Coloring (1-2 tablespoons): Creates the vibrant red color.
- White Chocolate Chips (3/4 cup): Adds sweet, creamy pockets throughout.
Variations for Red Velvet Brownies
- Cream Cheese Swirl: Drop spoonfuls of sweetened cream cheese on top and swirl with a knife before baking.
- Add Nuts: Mix in chopped pecans or walnuts for extra crunch.
- Different Chips: Try milk chocolate or dark chocolate chips instead of white chocolate.
- Natural Color: Use beet powder for a more natural red hue.
- Frosting: Top cooled brownies with cream cheese frosting for extra decadence.
How to Make Red Velvet Brownies Step-by-Step Instructions
1. Prepare Your Pan
Preheat your oven to 350°F. Line a 9×9-inch baking pan with parchment paper or grease it well with cooking spray.
2. Melt the Butter
In a medium saucepan or microwave-safe bowl, melt the unsalted butter. Let it cool slightly while you gather other ingredients.
3. Mix Wet Ingredients
Pour the melted butter into a large bowl. Add granulated sugar and whisk until combined. Mix in eggs one at a time, then add vanilla extract, white vinegar, and red food coloring. Stir until the mixture is smooth and vibrant red.
4. Add Dry Ingredients
In a separate bowl, whisk together all-purpose flour, cocoa powder, and salt. Slowly fold the dry ingredients into the wet mixture using a rubber spatula. Mix just until no flour streaks remain. Do not overmix.
5. Fold in White Chocolate Chips
Gently fold in the white chocolate chips, reserving a few to sprinkle on top if desired.
6. Bake
Pour the batter into your prepared pan and spread evenly. Bake for 22-25 minutes. The brownies are done when a toothpick inserted in the center comes out with a few moist crumbs. Do not overbake.
7. Cool
Let the brownies cool completely in the pan before cutting into squares.
Serving and Decoration
How to Serve Red Velvet Brownies
These beautiful brownies are versatile and work for many occasions:
- Plain: Enjoy them as-is for a simple, fudgy treat.
- With Ice Cream: Serve warm with vanilla ice cream on top.
- Frosted: Add a layer of cream cheese frosting for extra richness.
- Dusted: Sprinkle powdered sugar over cooled brownies for an elegant look.
- Drizzled: Melt white chocolate and drizzle over the top for decoration.
Storing Red Velvet Brownies
- Room Temperature: Store in an airtight container for up to 3 days.
- Refrigerator: Keep in the fridge for up to 1 week if frosted or if your kitchen is warm.
- Freezer: Wrap individual brownies in plastic wrap, then place in a freezer bag for up to 3 months. Thaw at room temperature before serving.
Tips and Tricks for Success
- Don’t Overmix: Mix just until ingredients combine to keep brownies fudgy, not cakey.
- Use Gel Food Coloring: Gel or paste food coloring creates a deeper red without thinning the batter.
- Check Early: Start checking for doneness at 22 minutes. Ovens vary.
- Line Your Pan: Parchment paper makes removal easy and cleanup simple.
- Let Them Cool: Brownies set as they cool. Cutting too early can make them crumbly.
Nutrition
| Nutrient | Per Brownie (1/16 of recipe) |
|---|---|
| Calories | 165 |
| Total Fat | 7g |
| Saturated Fat | 4g |
| Cholesterol | 35mg |
| Sodium | 55mg |
| Total Carbohydrates | 24g |
| Dietary Fiber | 1g |
| Sugars | 18g |
| Protein | 2g |
Nutritional values are approximate and may vary based on specific ingredients used.
Red Velvet Brownies
Course: Uncategorized15
minutes25
minutes165
kcalIngredients
1/2 cup (113g) unsalted butter, melted
1/4 cup (25g) unsweetened cocoa powder
1/4 teaspoon table salt
1 cup (200g) granulated sugar
2 large eggs, at room temperature
1 teaspoon pure vanilla extract
1 teaspoon white vinegar
3/4 cup (94g) all-purpose flour (spooned & leveled)
1-2 tablespoons Wilton red food coloring
3/4 cup (135g) white chocolate chips
Directions
- Preheat Oven: Preheat oven to 350°F (177°C). Line a 9×9-inch baking pan with parchment paper or grease well.
- Melt Butter: Melt the butter and let it cool slightly.
- Mix Wet Ingredients: In a large bowl, whisk together melted butter and sugar. Add eggs one at a time, mixing well after each. Stir in vanilla extract, white vinegar, and red food coloring until smooth.
- Combine Dry Ingredients: In a separate bowl, whisk together flour, cocoa powder, and salt.
- Form Batter: Gently fold the dry ingredients into the wet mixture until just combined. Do not overmix.
- Add Chips: Fold in white chocolate chips.
- Bake: Pour batter into prepared pan and spread evenly. Bake for 22-25 minutes, or until a toothpick inserted in the center comes out with a few moist crumbs.
- Cool: Let brownies cool completely in the pan before cutting into 16 squares.
Red Velvet Brownies FAQs
Can I use natural food coloring? Yes, but the color may be less vibrant. Beet powder is a natural alternative, though it may add a slight earthy taste.
Why do my brownies look more brown than red? Use gel or paste food coloring for a deeper red. Liquid food coloring can dilute the batter and create a weaker color.
Can I make these without vinegar? The vinegar adds the classic red velvet tang and helps activate the color. You can substitute with lemon juice if needed.
How do I know when they’re done? A toothpick inserted in the center should come out with a few moist crumbs, not wet batter. The edges should look set.
Can I add frosting? Absolutely. Cream cheese frosting is traditional for red velvet and pairs beautifully with these brownies.
Conclusion
Red Velvet Brownies bring together the best qualities of fudgy brownies and classic red velvet cake in one stunning dessert. With their rich chocolate flavor, eye-catching color, and simple preparation, these brownies are perfect for any occasion. Whether you serve them plain, frosted, or with ice cream, they’re sure to disappear quickly.