Look, I’m not going to sugarcoat this.
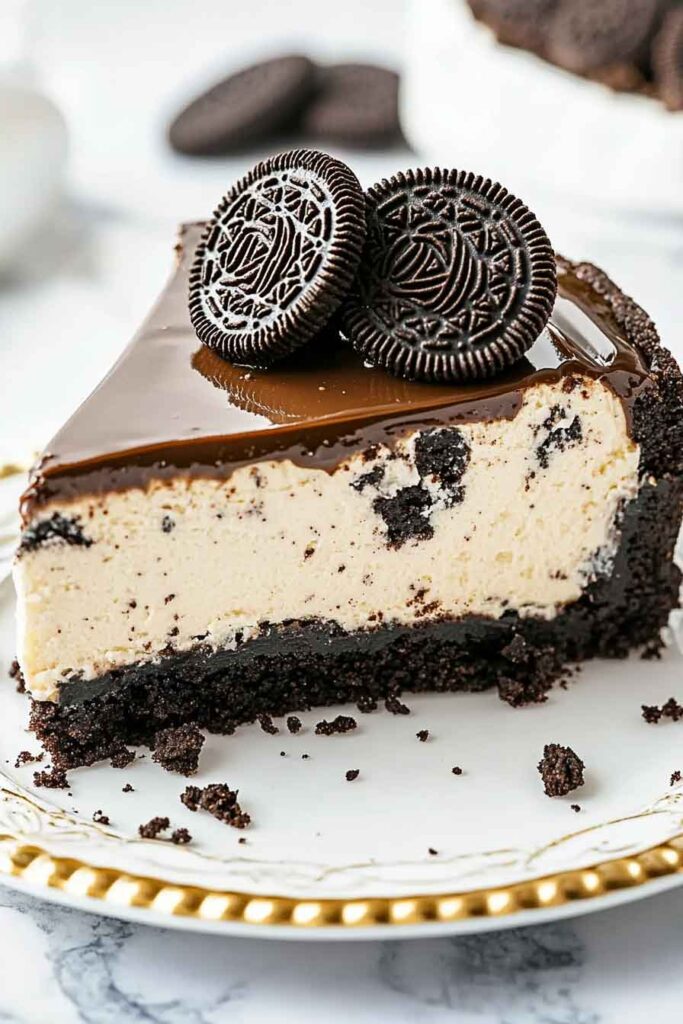
This Oreo Cheesecake is ridiculously good. The kind of good that makes people ask for seconds. The kind of good that has readers messaging me things like “This cheesecake is pure magic on a plate” and “Best cheesecake I’ve ever made.”
And honestly? I get it.
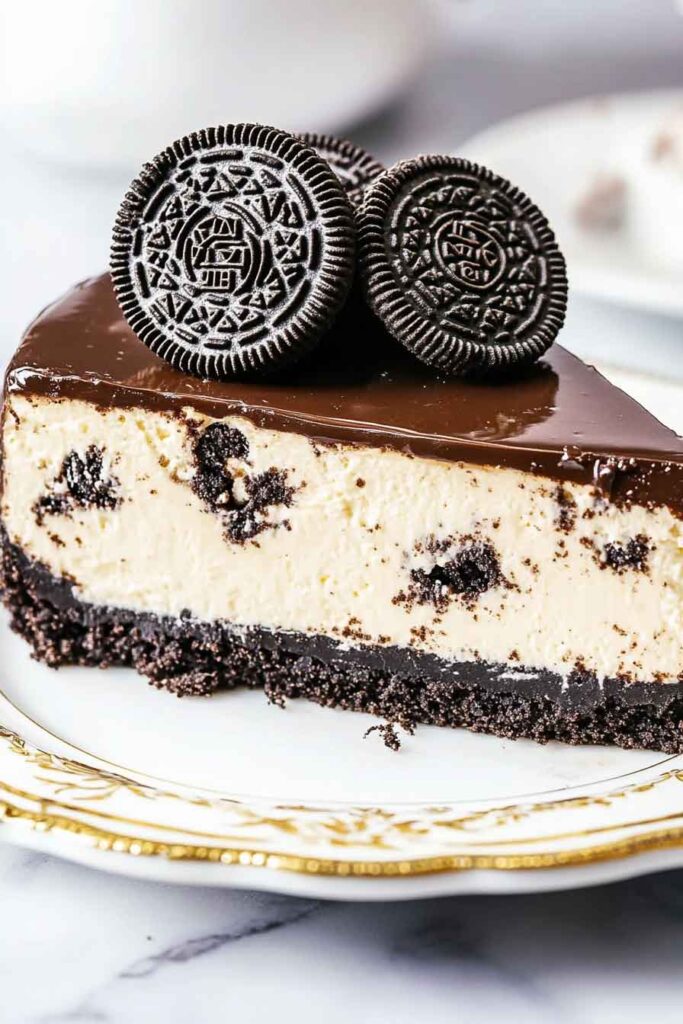
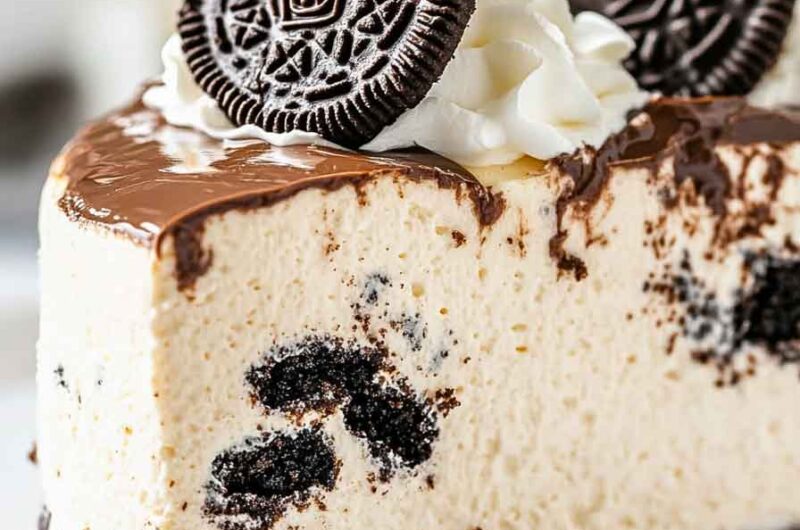
You’ve got this creamy, dreamy filling packed with crushed Oreos. An Oreo cookie crust that’s crunchy and buttery. And a texture so smooth it practically melts on your tongue.
Perfect for birthdays, dinner parties, or just because it’s Tuesday and you deserve something amazing.
Why This Recipe Actually Works
Here’s what makes this cheesecake different:
- People can’t stop raving about it. Seriously, check the comments. One reader called it a “show-stopper.” Another said it was “absolutely divine.”
- The texture is unreal. That velvety cream cheese filling combined with Oreo chunks? Unforgettable.
- It looks fancy. Like you bought it from a bakery. But between you and me? It’s actually pretty manageable.
- Make it ahead. Bake it the day before. Less stress for you, better flavor for everyone.
- Feeds a crowd. One cheesecake = 12 generous slices. Party problem solved.
What You Need to Know First
Time Breakdown
- Prep Time: 25 minutes
- Bake Time: 1 hour 15 minutes
- Chill Time: 8 hours (overnight is better)
- Total Time: About 9.5 hours
Yeah, it’s not quick. But most of that is hands-off chilling time.
How Many Slices?
This makes one 9-inch cheesecake. You’ll get 12 solid slices out of it.
Is This Hard to Make?
Moderate difficulty.
You’ll need patience for the chilling and baking. But the actual steps? Pretty straightforward. Even beginners can nail this.
Kitchen Stuff You’ll Need
- 9-inch springform cake pan
- Stand or hand mixer
- Medium mixing bowls
- Large mixing bowl
- Food processor (optional but helpful)
- Measuring cups and spoons
- Wire rack
- Aluminum foil
- Water bath roasting pan
Ingredients for Oreo Cheesecake
Here’s everything you need. Nothing fancy or hard to find.
For the Oreo Cookie Crust:
- 1 and 1/4 cups (about 110g) roughly chopped Oreos (approximately 10 whole Oreos)
- 3/4 cup (170g) unsalted butter, melted
- 2 tablespoons granulated sugar
For the Creamy Cheesecake Filling:
- 32 ounces (907g) full-fat cream cheese, softened to room temperature
- 1 cup (200g) granulated sugar
- 1/2 cup (100g) packed light brown sugar
- 4 large eggs, at room temperature
- 2 teaspoons pure vanilla extract
- 1/2 cup (120ml) sour cream
- 1/4 cup (60ml) heavy cream
- 1 and 1/4 cups (about 110g) roughly chopped Oreos (additional, for filling)
For the Topping:
- 1/2 cup (120ml) heavy cream, whipped
- Dark chocolate chips (optional)
- Additional crushed Oreos for garnish (optional)
Want to Mix It Up?
Here are some fun twists:
- Chocolate Swirl: Melt 1/4 cup dark chocolate and swirl it through the filling before baking. Gorgeous and delicious.
- Peanut Butter Twist: Mix 1/2 cup peanut butter into part of the filling. Layer it with the regular filling. Trust me on this one.
- Mini Cheesecakes: Use muffin tins with cupcake liners. Bake for 25-30 minutes instead. Perfect for parties.
- Salted Caramel Topping: Drizzle salted caramel sauce over the top before serving. Game changer.
- Brownie Bottom: Add a fudgy brownie layer under the crust. Because why not?
- No-Bake Version: Skip the oven entirely for a lighter version. Use a smaller recipe.
How to Make This Step-by-Step
1. Prepare Your Pan
First things first.
Preheat your oven to 325°F (163°C).
Now grab that springform pan and wrap the outside with aluminum foil. This stops water from sneaking in during the water bath. You’ll thank me later.
2. Make the Oreo Cookie Crust
Take your roughly chopped Oreos, melted butter, and sugar.
Mix them together until it looks like wet sand.
Press this mixture firmly into the bottom of your pan. Make it even. This is your flavor foundation.
3. Prepare the Cheesecake Filling
Beat the softened cream cheese on medium speed for 2-3 minutes.
You want it smooth and creamy. No lumps.
Add both sugars gradually. Keep beating until it’s light and fluffy. About 3 minutes. This step incorporates air and creates that silky texture everyone loves.
4. Add the Eggs and Flavoring
Here’s where people mess up.
Add eggs one at a time. Beat on low speed after each one. Just until combined.
Don’t overmix. Too much air = cracks later.
Pour in the vanilla extract. Beat until just combined.
5. Incorporate Sour Cream and Heavy Cream
Gently fold in the sour cream and heavy cream.
Use a spatula or low mixer speed. These ingredients add richness and help prevent cracking.
Be gentle here. Seriously.
6. Add the Crushed Oreos
Fold in that extra 1 and 1/4 cups of chopped Oreos.
Use a spatula. Get them distributed evenly throughout.
7. Pour and Prepare for Baking
Pour the filling over your Oreo crust.
Smooth the top with a spatula.
Now place the springform pan inside a larger roasting pan. Pour hot water into the roasting pan until it reaches halfway up the sides of your springform pan.
This is called a water bath. It’s your secret weapon for even, gentle heat.
8. Bake
Bake for 1 hour and 15 minutes.
How do you know it’s done?
The edges should be set. But the center should still jiggle a bit when you shake it gently. Like a 2-inch circle in the middle.
Internal temperature should be around 150°F at the center.
9. Cool Gradually
Turn off the oven.
Crack the door open about 4 inches.
Let the cheesecake sit there for 1 hour.
This prevents cracks. Sudden temperature changes are your enemy.
10. Chill Completely
Remove from the oven. Let it cool to room temperature for about 1 hour.
Then?
Refrigerate for at least 8 hours. Overnight is better.
This isn’t optional. The flavors need time to develop. The texture needs time to set.
11. Unmold and Serve
Run a thin knife around the edges before unspringing the pan.
This prevents the top from cracking.
Top with whipped cream, dark chocolate chips, and crushed Oreos if you want to get fancy.
How to Serve This Beauty
This cheesecake works in pretty much any setting:
- Dinner Parties: Serve cold slices on dessert plates. Add a drizzle of chocolate sauce.
- Potlucks: Bring the whole thing. It travels well.
- With Beverages: Coffee, hot chocolate, or milk. Classic combinations.
- With Fresh Fruit: Berries add color and cut through the richness.
- Individual Plating: Dollop of whipped cream. Sprinkle of crushed Oreos. Done.

Make It Pretty
Want to dress it up?
- Dust with cocoa powder
- Add chocolate ganache dripping down the sides
- Top with crushed Oreos and white chocolate shavings
- Create a chocolate or caramel drizzle pattern on the plate
Storing Your Cheesecake
- Refrigerator: Keep it covered in an airtight container for up to 5 days. Fun fact? It actually tastes better after a day or two.
- Freezer: Wrap individual slices or the whole thing in plastic wrap and aluminum foil. Freezes for up to 2 months. Thaw overnight in the fridge before serving.
- Room Temperature: Don’t. Cream cheese and eggs need to stay cold. Don’t leave it out for more than 2 hours.
My Best Tips for Success
Room Temperature Ingredients
This is huge.
Cold cream cheese creates lumps. Let everything sit at room temperature for at least 1 hour before you start.
Don’t Overmix
After you add the eggs? Mix only until just combined.
Overmixing = too much air = cracks.
Use a Water Bath
Non-negotiable.
The gentle, moist heat prevents the edges from overbaking. It’s the difference between a cracked mess and a creamy dream.
Get a Springform Pan
Makes your life so much easier. The removable sides mean you can unmold without destroying your masterpiece.
Let It Cool Slowly
The gradual cooling prevents cracks. Don’t skip this step. I know you want to taste it. Wait.
Chill Overnight
Eight hours is the minimum. But overnight? That’s when the magic happens. Flavors develop. Slicing gets cleaner.
Sharp Knife Trick
Dip a sharp knife in hot water. Wipe it clean between each slice. You’ll get perfect, clean portions.
Cracks Happen
If your cheesecake cracks a little? Cover it with whipped cream or chocolate ganache. No one will know.
Nutrition Information
| Nutrient | Per Slice (1/12) |
|---|---|
| Calories | 485 |
| Total Fat | 32g |
| Saturated Fat | 19g |
| Trans Fat | 0.5g |
| Cholesterol | 125mg |
| Sodium | 385mg |
| Total Carbohydrates | 42g |
| Dietary Fiber | 0.5g |
| Sugars | 36g |
| Protein | 8g |
| Calcium | 185mg |
| Iron | 0.8mg |
These are estimates based on USDA standards. Your actual numbers might vary depending on specific brands.
Oreo Cheesecake
Course: Dessert Recipes12
slices25
minutes1
hour15
minutes485
kcal8
hours (overnight recommended)Ingredients
- Oreo Cookie Crust:
1 and 1/4 cups (110g) roughly chopped Oreos (about 10 cookies)
3/4 cup (170g) unsalted butter, melted
2 tablespoons granulated sugar
- Cheesecake Filling:
32 ounces (907g) full-fat cream cheese, softened
1 cup (200g) granulated sugar
1/2 cup (100g) packed light brown sugar
4 large eggs, room temperature
2 teaspoons pure vanilla extract
1/2 cup (120ml) sour cream
1/4 cup (60ml) heavy cream
1 and 1/4 cups (110g) roughly chopped Oreos
- Topping (Optional):
1/2 cup (120ml) heavy cream, whipped
Dark chocolate chips
Crushed Oreos
Directions
- Prep the pan.
Preheat oven to 325°F (163°C). Wrap the outside of a 9-inch springform pan with aluminum foil to prevent leaks during the water bath. - Make the crust.
Mix chopped Oreos, melted butter, and sugar until it looks like wet sand. Press firmly into the bottom of the pan. - Beat the cream cheese.
Beat softened cream cheese on medium speed for 2-3 minutes until smooth and lump-free. Add both sugars and beat for 3 minutes until fluffy. - Add eggs and vanilla.
Add eggs one at a time on low speed, mixing just until combined. Don’t overmix. Add vanilla and beat briefly. - Mix in dairy.
Gently fold in sour cream and heavy cream using a spatula or low speed. These help prevent cracking. - Fold in Oreos.
Fold in the additional chopped Oreos with a spatula until evenly distributed. - Prepare water bath.
Pour filling over crust and smooth the top. Place springform pan in a larger roasting pan. Add hot water to the roasting pan until it reaches halfway up the sides of the springform. - Bake.
Bake 1 hour 15 minutes. The edges should be set, but the center (about 2 inches) should jiggle slightly. Internal temp should read 150°F. - Cool gradually.
Turn off oven and crack the door 4 inches. Let sit for 1 hour. This prevents cracks. - Chill completely.
Remove from oven. Cool to room temperature for 1 hour, then refrigerate at least 8 hours or overnight. - Serve.
Run a thin knife around edges before releasing the springform. Top with whipped cream, chocolate chips, and crushed Oreos if desired.
Notes
- Serving Suggestions:
Serve chilled with coffee, hot chocolate, or milk
Pair with fresh berries for brightness
Drizzle with chocolate or caramel sauce
Add a dollop of whipped cream to each slice - Tips & Tricks:
Room temp ingredients are crucial. Let cream cheese and eggs sit out for 1 hour before starting.
Don’t skip the water bath. It’s the secret to creamy, crack-free texture.
Mix gently after adding eggs. Overmixing causes cracks.
Chill overnight for best results. Flavors develop and slicing gets cleaner.
Hot water knife trick: Dip your knife in hot water and wipe clean between slices for perfect cuts.
If cracks appear, hide them with whipped cream or ganache. - Storage & Reheating:
Fridge: Cover tightly and store up to 5 days. Tastes even better after day 2.
Freezer: Wrap in plastic wrap and foil. Freeze up to 2 months. Thaw overnight in fridge.
Never leave out: Keep refrigerated. Don’t leave at room temp for more than 2 hours. - Nutrition (per slice): 485 calories | 32g fat | 42g carbs | 8g protein
Your Questions Answered
Can I make this without a water bath?
You can, but I really don’t recommend it.
The water bath ensures even cooking and prevents cracks. It creates that smooth texture everyone raves about.
If you absolutely don’t have a roasting pan? Bake it without one. But expect some cracks. Open the oven door halfway through baking and let it cool very, very slowly.
Why did my cheesecake crack?
Usually it’s one of two things:
Rapid temperature changes. Or overmixing.
Always use a water bath. Cool gradually in the oven. Mix gently after adding eggs.
Can I use reduced-fat cream cheese?
You can. But don’t.
Full-fat cream cheese gives you the best texture and flavor. Reduced-fat versions make a less creamy filling. You’re making cheesecake. Go all in.
How do I know when it’s done?
The edges should be set and slightly puffed.
The center (about a 2-inch circle) should still jiggle a bit.
Internal temperature should read around 150°F at the center.
Can I make this ahead?
Absolutely.
Bake it up to 2 days in advance. Keep it covered in the fridge. You can also freeze it for up to 2 months.
What should I serve with this?
Coffee. Milk. Hot chocolate. Fresh berries. Chocolate sauce.
All of these pair beautifully with this dessert.
Final Thoughts
Here’s the thing about this Oreo Cheesecake.
It combines simple ingredients to create something that tastes like it came from a fancy bakery. The creamy filling. The crunchy Oreo crust. The flavor that makes people close their eyes when they take a bite.
Perfect for celebrations. Special occasions. Or just because you want to treat yourself.
With patience and careful attention, you’ll create a cheesecake that impresses everyone at your table.
Whether you’ve made a hundred cheesecakes or this is your first one? This recipe is designed to work.
So grab your ingredients. Set aside some time. And get ready to make something amazing.