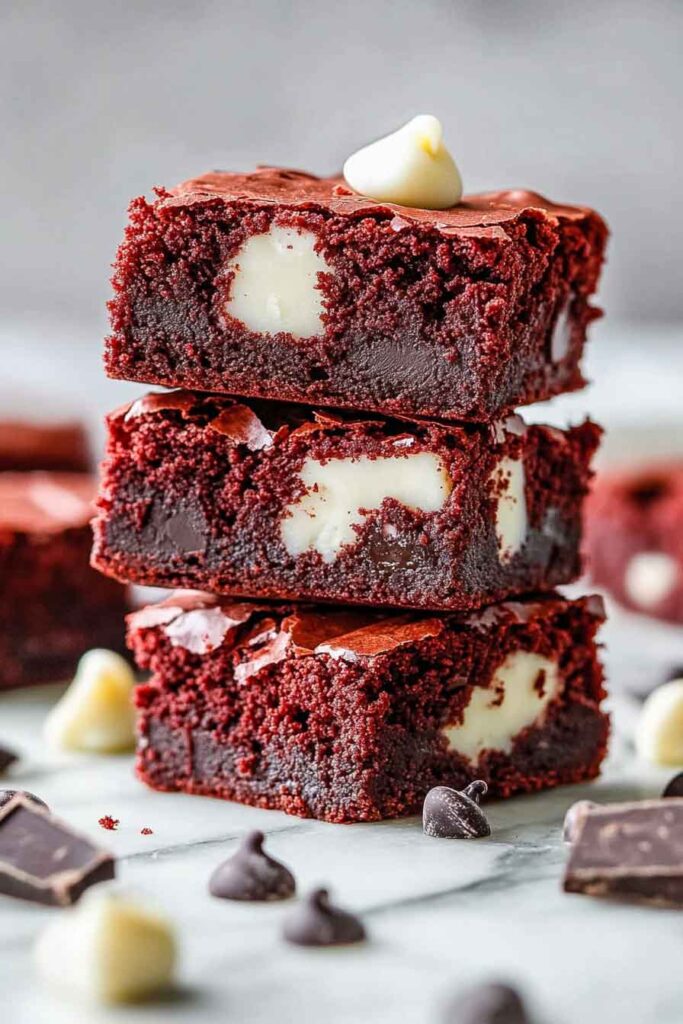
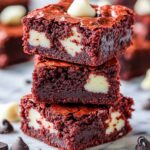
Alright, these red velvet brownies? They’re rich, fudgy, and have that deep cocoa flavor with a hint of tang—all wrapped in that gorgeous red color. It’s like a brownie and red velvet cake had the most delicious baby.
I made them when I wanted something a little more special than plain brownies. Mixed in some cocoa, vanilla, and just the right touch of vinegar, then baked until perfectly soft and chewy. Topped them with a swirl of cream cheese frosting—and wow, they didn’t last long.
They’re perfect for holidays, parties, or anytime you want a dessert that looks as good as it tastes. Let’s bake a batch—you’re gonna fall in love with every bite.
Why You’ll Love This Recipe
- Reliable Results: Home bakers appreciate how these brownies bake up evenly with a moist, tender crumb. They don’t dry out easily and keep their color and shape well.
- Balanced Flavor: Instead of heavy chocolate, you’ll taste a mild cocoa with a bit of tang from the vinegar. It’s not just a chocolate brownie with food coloring—red velvet has its own personality.
- No Mixer Required: You can use a hand mixer, but everything comes together easily with just a whisk and a spatula. This makes clean-up fast and lets anyone bake, even without fancy equipment.
- Flexible Serving: These brownies work for everyday snacks or special occasions. The vibrant red color is eye-catching, especially for Valentine’s Day, birthdays, or Christmas platters.
- Kid-Approved: The gentle taste and bright color are always a hit with children, making this a great recipe for family baking.
What You Need to Know Before You Start
Prep Time & Cook Time:
- Preparation Time: 20 minutes. This includes melting the butter, measuring, mixing, and lining your baking pan.
- Baking Time: 30 minutes. Brownies need to bake until a toothpick inserted in the center comes out with just a few moist crumbs, not wet batter.
- Cooling Time: Plan for at least 20 minutes before slicing. This helps brownies firm up, so you get neat squares.
Total Time: About 50 minutes from start to finish, plus extra time if you want them fully cooled before cutting.
Servings:
This recipe fills an 8×8-inch pan, making 16 squares if you cut them small, or 9 large pieces if you like bigger brownies.
Difficulty Level:
Beginner-friendly. No advanced skills required. As long as you measure carefully and mix until just combined, you’ll get good results. The most important step is not to overbake, which keeps brownies moist.
Required Kitchen Tools
To prepare and bake red velvet brownies, you’ll need:
- Large Mixing Bowl: For combining wet ingredients.
- Medium Mixing Bowl: For sifting and whisking dry ingredients.
- Measuring Cups and Spoons: Accurate measuring ensures the right texture.
- Rubber Spatula: For folding batter gently, so you don’t overmix.
- Whisk: Helps blend melted butter, sugar, eggs, and coloring smoothly.
- 8×8-inch Baking Pan: Metal pans bake more evenly than glass, but both work.
- Parchment Paper or Nonstick Spray: For easy removal after baking.
- Toothpick or Cake Tester: To check for doneness.
- Wire Rack: For cooling the pan once brownies are baked.
Optional:
- Hand Mixer or Stand Mixer: Speeds up mixing, but isn’t required for this recipe.
- Offset Spatula: For smoothing the top of the batter before baking.
Ingredients for Red Velvet Brownies
These ingredients create the signature red velvet taste and texture. For best results, use the exact measurements found in the recipe card at the end.
- Unsalted Butter (melted): Gives richness, helps brownies stay soft, and makes mixing easy.
- Granulated Sugar: Adds sweetness and helps create a crackly top.
- Eggs: Bind the batter and add moisture for a fudgy center.
- Pure Vanilla Extract: Rounds out the cocoa and makes the flavor more complex.
- Distilled White Vinegar: Reacts with baking soda and cocoa, adding a subtle tang. Also helps lock in the red color.
- Red Food Coloring: Wilton gel or liquid food color gives a vibrant, deep red. You need enough to get a true red without turning the batter pink.
- Unsweetened Cocoa Powder: Use natural cocoa (not Dutch-processed) for the best red color. Too much cocoa will overpower the color and make brownies taste more like chocolate cake.
- All-Purpose Flour: Keeps brownies sturdy but not cakey. Spoon flour into the cup, then level it for accuracy.
- Salt: Enhances all the other flavors and keeps sweetness balanced.
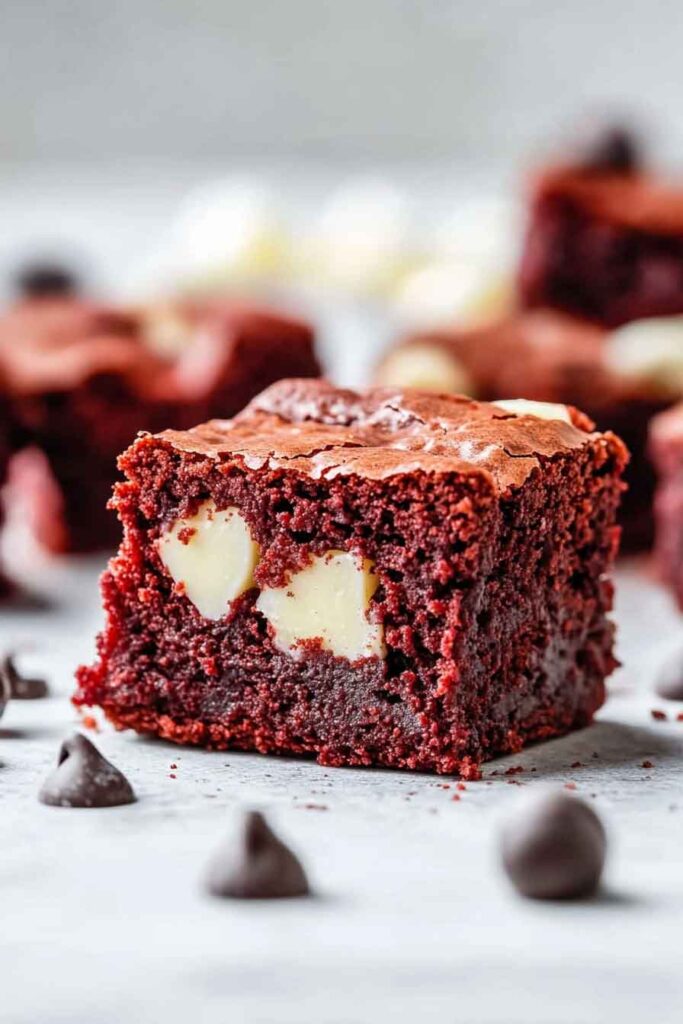
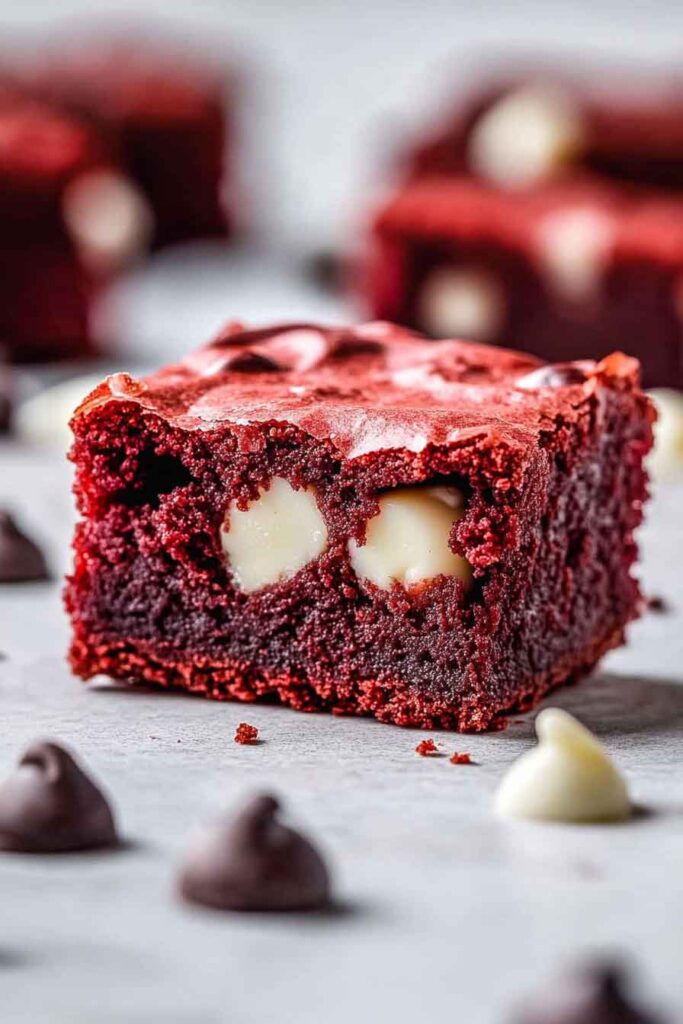
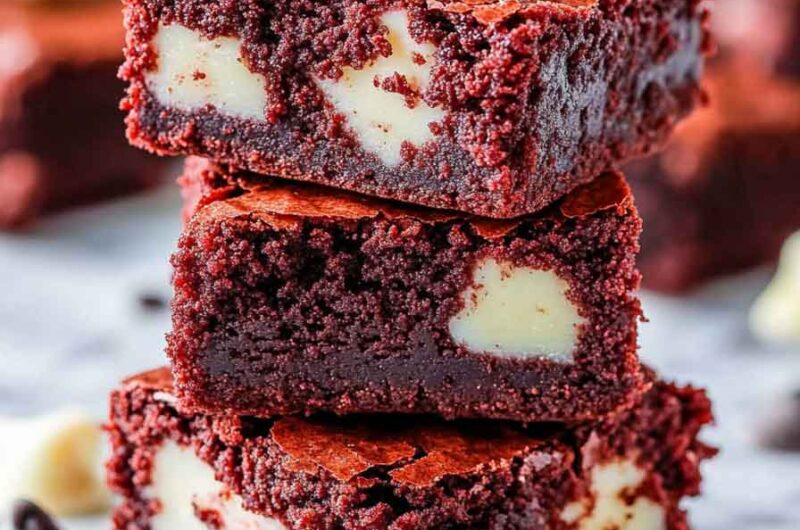
- White Chocolate Chips: For pockets of creamy sweetness. These melt into the batter and make every bite special.
Optional add-ins: chopped nuts, extra chocolate chips, or a swirl of softened cream cheese (for variation ideas, see below).
Variations for Red Velvet Brownies
- Cream Cheese Swirl: Beat 4 oz. cream cheese with 2 Tbsp. sugar and 1 egg yolk until smooth. Drop spoonfuls over the brownie batter, then swirl gently with a toothpick before baking.
- Nutty Addition: Fold in ½ cup of chopped walnuts or pecans for crunch and a classic touch.
- More Chocolate: Add a handful of semisweet or dark chocolate chips for richer flavor.
- Frosted Brownies: Once cooled, spread a thin layer of cream cheese frosting on top for an extra-sweet finish.
- Mini Brownies: Use a mini muffin tin and reduce bake time for bite-size brownie “bites” perfect for parties.
How to Make Red Velvet Brownies: Step-by-Step Instructions
1. Prepare Your Pan and Gather Ingredients
Before you start, preheat your oven to 350°F (175°C).
Line an 8×8-inch baking pan with parchment paper, letting the edges hang over for easy lifting. If you don’t have parchment, lightly coat the pan with nonstick spray.
Set out all ingredients so the eggs and butter can come to room temperature. This helps the batter mix evenly and gives the best texture.
2. Mix the Wet Ingredients
In a large mixing bowl, pour in the melted, slightly cooled unsalted butter. Add the granulated sugar. Whisk these together for about 1 minute, until well blended and slightly creamy.
Crack in the eggs, one at a time, whisking gently after each. Stir in the pure vanilla extract and white vinegar.
Now, add your red food coloring. Start with about 2 teaspoons if using gel, or 1 tablespoon if using liquid. Whisk until the color is even and bright. The mixture should look glossy and deep red. If the color is too pale, add a little more food coloring.
3. Combine Dry Ingredients
In a medium bowl, sift or whisk together the all-purpose flour, unsweetened cocoa powder, and salt. Sifting helps prevent lumps and ensures even mixing.
4. Bring Wet and Dry Ingredients Together
Add the dry ingredients into the wet mixture in two batches. Use a rubber spatula to fold gently—this means using slow, circular motions, scraping down the sides and bottom. Mix just until no streaks of flour remain. Overmixing will make brownies dense or tough.
Fold in the white chocolate chips last. Reserve a small handful to sprinkle on top before baking for a pretty finish, if you like.
5. Spread and Smooth the Batter
Pour the thick, red batter into your prepared baking pan. Use a spatula or the back of a spoon to spread it evenly, reaching all four corners. Sprinkle any reserved white chocolate chips over the top.
Tap the pan lightly on the counter to settle the batter and release any large air bubbles.
6. Bake
Place the pan in your preheated oven on the center rack. Bake for 28–32 minutes.
Check at the 28-minute mark: Insert a toothpick in the center. If it comes out with just a few moist crumbs (not raw batter), they are done. If the toothpick is wet, bake for another 2–4 minutes and check again.
Brownies continue to cook a little after coming out of the oven, so avoid overbaking. The top should look set and slightly shiny, with a gentle crackle.
7. Cool and Slice
Remove the pan from the oven and place it on a wire rack. Let brownies cool in the pan for at least 20–30 minutes—this is important for neat squares and fudgy centers.
Once cooled, lift brownies out using the parchment “handles.” Place on a cutting board. Use a sharp knife to slice into 16 small bars or 9 large ones. Wipe the knife clean between cuts for the sharpest edges.
Serving and Decoration
Serve brownies as they are for a simple, chewy treat, or add an extra touch:
- Dust lightly with powdered sugar for a snowy look.
- Top with a few extra white chocolate chips while brownies are still warm.
- Drizzle with melted white chocolate for a fancy effect.
- Add a small dollop of cream cheese frosting on each square for a special finish.
These brownies are eye-catching on any dessert tray and taste great at room temperature or slightly chilled.
Storing Red Velvet Brownies
- Room Temperature: Store leftover brownies in an airtight container at room temperature for up to 3 days. Keep them in a cool, dry place out of direct sunlight.
- Refrigerator: For longer freshness, place brownies in the fridge. They stay moist for up to a week. Allow brownies to come to room temperature before serving for the best texture.
- Freezer: For even longer storage, wrap cooled brownies tightly in plastic wrap, then place in a freezer bag or container. They keep well for up to 2 months. Thaw overnight in the refrigerator or at room temperature before enjoying.
Tips and Tricks for Success
- Don’t Overmix: Stop stirring as soon as you see no streaks of flour; this keeps brownies soft.
- Check Early: Ovens vary. Begin testing brownies a few minutes before the suggested time.
- Room Temp Ingredients: Eggs and melted butter mix more smoothly if not cold.
- Vibrant Red Color: Gel food coloring gives a deeper red than liquid, but both work. Add a bit more if your batter looks pale.
- Clean Slices: Let brownies cool fully before slicing, and wipe the knife between cuts.
- Customize: Feel free to add nuts or swirl with softened cream cheese for your personal touch.
Nutrition
| Serving Size | Calories | Fat | Saturated Fat | Carbohydrates | Sugar | Protein |
|---|---|---|---|---|---|---|
| 1 brownie (1/16 of pan) | 180 | 9g | 5g | 25g | 18g | 2g |
Nutrition values are estimates and can vary based on exact ingredients and serving size.
Red Velvet Brownies
Course: Dessert Recipes16
brownies20
minutes30
minutes180
kcalIngredients
1/2 cup (113g) unsalted butter, melted and slightly cooled
1 cup (200g) granulated sugar
2 large eggs, at room temperature
2 teaspoons vanilla extract
1 teaspoon distilled white vinegar
2 tablespoons red food coloring (gel or liquid, more as needed)
3/4 cup (95g) all-purpose flour, spooned and leveled
2 tablespoons (12g) unsweetened cocoa powder (not Dutch-processed)
1/4 teaspoon salt
3/4 cup (130g) white chocolate chips
Directions
- Preheat and Prepare:
Preheat oven to 350°F (175°C). Line an 8×8-inch pan with parchment paper or grease well. - Mix Wet Ingredients:
In a large bowl, whisk melted butter and sugar until smooth. Add eggs, one at a time, whisking after each. Stir in vanilla, vinegar, and food coloring. - Add Dry Ingredients:
In a separate bowl, whisk flour, cocoa powder, and salt. Add to wet mixture in two additions, folding gently with a spatula until just combined. Fold in white chocolate chips. - Bake:
Spread batter evenly in the pan. Sprinkle extra chocolate chips on top if desired. Bake 28–32 minutes, or until a toothpick in the center comes out with a few moist crumbs. - Cool and Serve:
Cool completely in the pan. Lift out with parchment and cut into squares.
Red Velvet Brownies FAQs
Can I double the recipe?
Yes. Use a 9×13-inch pan and adjust baking time—start checking at 35 minutes.
Can I use Dutch-processed cocoa?
It’s best to use natural cocoa to preserve the classic red color.
Do I need food coloring?
Yes, for true red velvet. Without it, the brownies will taste fine but look more brown.
Can I freeze brownies?
Absolutely. Wrap tightly and freeze up to 2 months.
Can I make these gluten-free?
You can use a cup-for-cup gluten-free flour substitute. Texture may vary slightly.
Conclusion
Red Velvet Brownies are a soft, chewy treat with a gentle cocoa taste and a bold red look. Easy to make, they are perfect for sharing at family events or celebrations. You can enjoy them plain or dress them up with nuts, cream cheese, or extra chocolate chips. Their beautiful color and crowd-pleasing flavor make them a standout dessert every time.


[…] I usually make them when I want to impress guests or treat myself to something that feels “fancy” without being complicated. The texture lands somewhere between a brownie and a cake — dense enough to feel indulgent, yet soft and velvety. Add a swirl of cream cheese frosting, and you’ve got a dessert that looks straight out of a bakery.View the full recipe here […]
[…] If you’re craving something classic but with a twist, these red velvet brownies are a must. They’ve got that soft, chewy texture with just enough cocoa to balance the sweetness. I love topping them with a light cream cheese glaze or dusting of powdered sugar. These are the brownies I reach for when I want a dessert that feels a little more elegant without being overcomplicated.Read the full recipe here […]