Look, I get it. You love your crusty artisan sourdough, but sometimes you just need a soft slice for a PB&J, right?
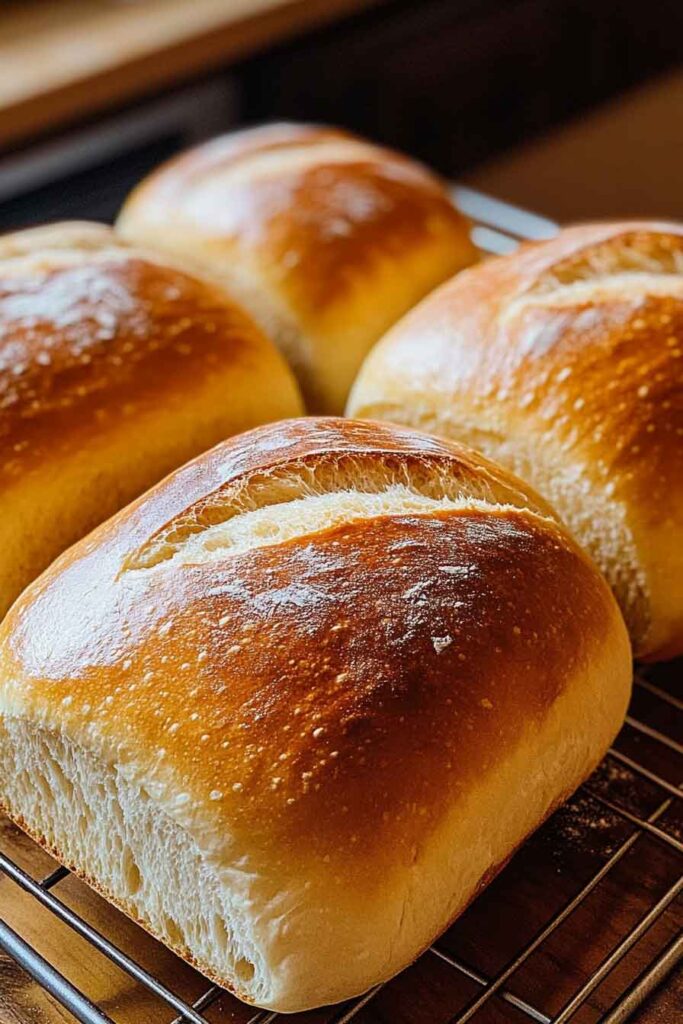
This soft sourdough sandwich bread is the answer. It’s got that gentle sourdough tang we all love, but with a cloud-like texture that’s perfect for actual sandwiches. And here’s the best part—it stays fresh for almost a week.
No more rock-hard loaves after two days.
Why You’ll Want to Make This
It’s actually soft. Unlike those crusty boules that crack your teeth, this bread slices like a dream. Perfect for kids’ lunches or your morning toast.
Beginners can handle this. I’m serious. If you can mix ingredients and shape dough, you’re good to go. No fancy techniques required.
It uses your active starter. You know that bubbly jar sitting on your counter? This is what it was made for.
Stays fresh forever. Okay, not forever. But five days is pretty incredible for homemade bread. The sourdough fermentation does something magical to keep it moist.
So versatile. Sandwiches. Toast. French toast. Bread pudding. You name it, this bread can do it.
Before You Start: Here’s What You Need to Know
Time breakdown:
- Active work: 30 minutes (that’s it!)
- First rise: 8-12 hours overnight
- Second rise: 2-3 hours
- Baking: 35-40 minutes
- Total: About 12-14 hours, but most of that is just waiting
What you’ll get: One beautiful 9×5-inch loaf. That’s about 12-14 slices. Want more? Just double everything.
Skill level: Honestly? Pretty easy. If you’re new to bread baking, this is a great place to start. The dough is forgiving and doesn’t require expert skills.
Kitchen Tools You’ll Need
Nothing fancy here:
- Large mixing bowl
- 9×5-inch loaf pan
- Kitchen scale (trust me, it makes things easier)
- Measuring cups and spoons
- Wooden spoon or dough whisk
- Kitchen towel or plastic wrap
- Sharp knife for scoring
- Cooling rack
That’s it. No stand mixer required.
The Ingredients
Simple stuff you probably already have. The butter makes it rich, and the honey balances out that sourdough tang beautifully.
For the dough:
- 1 cup (240g) active sourdough starter – bubbly and at its peak
- 3/4 cup (180ml) whole milk or buttermilk – warmed to room temp
- 3 and 1/2 cups (440g) all-purpose flour or bread flour – plus extra for dusting
- 3 tablespoons (42g) melted butter – or coconut oil, or even beef tallow if that’s your thing
- 2 tablespoons (30ml) honey or sugar – whatever you have works
- 1 and 1/2 teaspoons fine sea salt
For the finish:
- 1 tablespoon milk or buttermilk – brushed on top for that golden crust
Mix It Up: Recipe Variations
Want to get creative? Here are some ideas:
Whole wheat version: Swap half the flour for whole wheat. You’ll get more fiber and a nuttier flavor.
Herb bread: Toss in 2 tablespoons of dried rosemary, thyme, or Italian seasoning. Amazing with soup.
Seeded loaf: Add 1/4 cup of sunflower, sesame, or flax seeds. Extra crunch, extra nutrition.
Cinnamon swirl: Roll the dough with cinnamon sugar before shaping. Breakfast just got better.
Dairy-free: Use water or plant milk instead of dairy, and swap the butter for coconut oil. Works perfectly.
How to Make It: Step by Step
1. Mix the Dough
Grab your big bowl.
Throw in your active starter, warmed milk, melted butter, and honey. Stir until it looks mostly smooth—doesn’t have to be perfect.
Now add the flour and salt. Mix with a wooden spoon until everything comes together in a shaggy mess. No dry flour should be visible.
2. Knead and Develop the Dough
Dump that shaggy mess onto a floured surface.
Now knead for 8-10 minutes. I know, I know. Your arms might get tired. But this is what creates that soft, stretchy texture.
You’re done when the dough is smooth, elastic, and just slightly tacky. Not sticky—tacky. There’s a difference.
The windowpane test? Stretch a small piece thin. If you can see light through it without it tearing, you’re golden.
3. First Rise (The Overnight Magic)
Put your dough in a lightly greased bowl. Turn it once so all sides get a little oil.
Cover with a damp towel or plastic wrap.
Now here’s where the magic happens. Let it sit at room temperature for 8-12 hours. I usually do this overnight while I sleep.
When it’s ready, it should be doubled in size and look puffy with little bubbles throughout.
4. Shape the Loaf
Time to wake up and shape this beauty.
Gently deflate the dough—don’t punch it like some recipes say. Just press it down softly. Turn it onto a floured surface.
Pat it into a rectangle about 8 inches wide. Fold the short ends toward the center, like you’re folding a letter.
Then roll it up tightly from one short end to the other. Pinch that seam closed.
Drop it seam-side down into your greased loaf pan.
5. Second Rise
Cover the pan loosely with a towel.
Find a warm spot in your kitchen. Let it rise for 2-3 hours.
How do you know it’s ready?
The dough should crown about 1 inch above the pan rim. Press it gently with your finger—it should spring back slowly, not immediately.
6. Prepare to Bake
About 30 minutes before your second rise is done, preheat your oven to 375°F (190°C).
Once the dough is ready, brush the top gently with milk or buttermilk. This gives you that gorgeous golden finish.
7. Score and Bake
Take a sharp knife or bread lame and make one shallow slash down the center. This lets the bread expand properly without cracking in weird places.
Pop it in the oven.
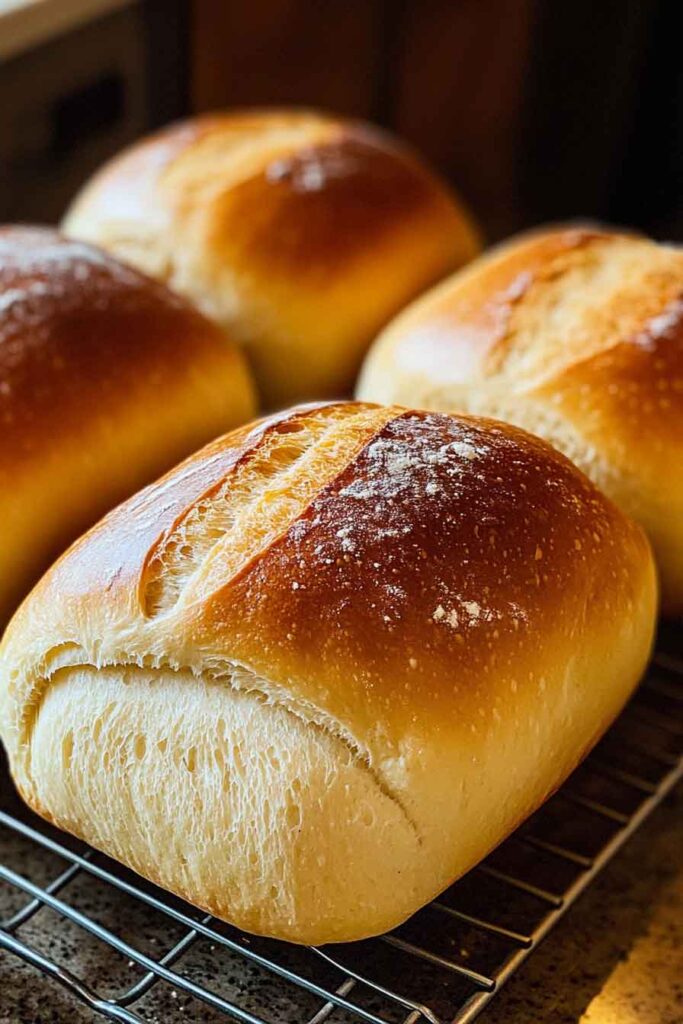
Bake for 35-40 minutes. You’re looking for a deep golden brown top. The internal temperature should hit 190°F (88°C) if you want to be precise.
8. Cool Completely
I know this is the hardest part.
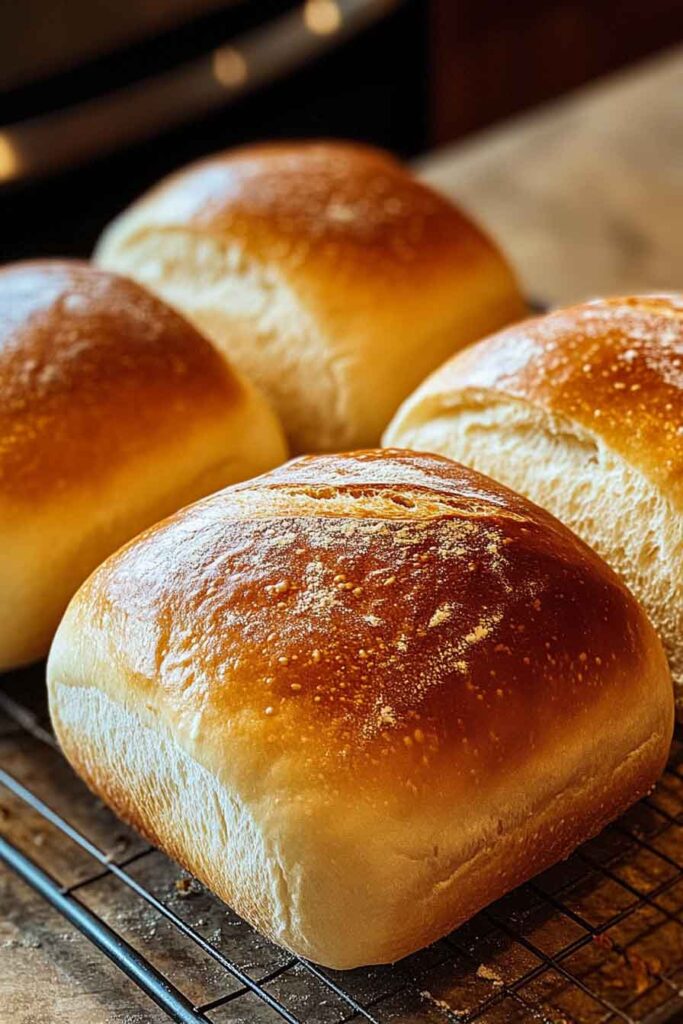
Take the bread out and let it rest in the pan for 5 minutes. Then turn it out onto a cooling rack.
Now wait. At least 1 hour before slicing.
I’m serious about this. If you cut into warm bread, you’ll get gummy, compressed slices. Just… don’t do it. Go watch TV or something.
How to Serve This Beautiful Bread
Classic sandwiches: Deli meat, cheese, lettuce, tomato. The basics never fail.
Grilled cheese: This bread crisps up perfectly when you butter it and throw cheese in the middle. Trust me.
Morning toast: Top with butter, jam, avocado, or peanut butter. Simple perfection.
French toast: Cut thick slices, soak them in egg mixture, and pan-fry. Weekend breakfast sorted.
Bread crumbs: Got leftovers? Dry them out and pulse into breadcrumbs. Use them for coating chicken or making stuffing.
Storing Your Bread
Room temperature: Keep the cooled loaf in a bread bag or wrapped in a clean kitchen towel. It’ll last up to 5 days. The sourdough’s natural acids fight off mold.
Don’t refrigerate. Seriously. The fridge will dry out your bread faster than you can say “stale.”
Freezer: Slice the bread first, then freeze in a freezer bag for up to 3 months. You can toast slices straight from frozen. Game changer.
Tips That Actually Matter
Use truly active starter. Your starter should be bubbly and doubled within 4-6 hours of feeding. If it’s sluggish, your bread will be too.
Temperature affects everything. Hot kitchen? Your dough will rise faster. Cool kitchen? Slower rise. Just adjust your timing.
Don’t skip the kneading. I know it’s work, but this is what creates that soft, stretchy texture. No shortcuts here.
The hollow sound test: Tap the bottom of your baked loaf. It should sound hollow. That’s how you know it’s done.
Wait to slice. I already said this, but it’s worth repeating. Warm bread = gummy slices. Cool bread = perfect slices.
Nutrition Facts
Here’s what you’re getting per slice (based on 12 slices):
| Nutrient | Amount |
|---|---|
| Calories | 180 |
| Total Fat | 4g |
| Saturated Fat | 2g |
| Cholesterol | 10mg |
| Sodium | 295mg |
| Total Carbohydrates | 31g |
| Dietary Fiber | 1g |
| Sugars | 3g |
| Protein | 5g |

Soft Sourdough Sandwich Bread
Course: Breakfasts1
loaf30
minutes35
minutes180
kcalIngredients
1 cup (240g) active sourdough starter, fed and bubbly
3/4 cup (180ml) whole milk or buttermilk, warmed to room temperature
3 and 1/2 cups (440g) all-purpose flour or bread flour
3 tablespoons (42g) unsalted butter, melted (or coconut oil/beef tallow)
2 tablespoons (30ml) honey or granulated sugar
1 and 1/2 teaspoons fine sea salt
1 tablespoon milk or buttermilk for brushing
Directions
- Mix: Combine active starter, warmed milk, melted butter, and honey in a large bowl. Stir well. Add flour and salt, mixing until no dry flour remains.
- Knead: Turn dough onto a floured surface and knead for 8-10 minutes until smooth and elastic.
- First Rise: Place in a greased bowl, cover, and let rise 8-12 hours at room temperature until doubled.
- Shape: Deflate dough gently. Pat into a rectangle, fold ends to center, then roll tightly. Place seam-side down in a greased 9×5-inch loaf pan.
- Second Rise: Cover and let rise 2-3 hours until dough crowns 1 inch above the pan.
- Bake: Preheat oven to 375°F (190°C). Brush loaf with milk and score the top. Bake 35-40 minutes until golden and internal temperature reaches 190°F.
- Cool: Rest in pan 5 minutes, then turn out onto a rack. Cool completely before slicing.
Notes
- (plus 8-12 hours first rise and 2-3 hours second rise)
Your Questions Answered
Can I use discard starter instead of active starter?
You can, but I don’t recommend it. Your bread might turn out dense and take forever to rise. Active starter at its peak gives you the best results.
Why is my bread dense?
Usually? Under-fermentation. Make sure your starter is truly active—not just alive, but active. And give it enough time for both rises. Patience wins here.
Can I speed up the rising time?
Sure. Put the dough in a warm spot like an oven with just the light on. But honestly? Slower fermentation gives you better flavor. It’s worth the wait.
How do I know when it’s ready to bake?
The dough should crown above the pan rim. Press it with your finger—if it springs back slowly, you’re good. If it springs back fast, give it more time.
Can I make this without a stand mixer?
Absolutely. This dough is totally manageable by hand. No fancy equipment needed.
Final Thoughts
Here’s the thing about this bread.
Once you make it, store-bought sandwich bread will taste like cardboard. I’m not exaggerating.
You get all that sourdough complexity and tang, but in a soft, sliceable package that actually works for everyday life. School lunches. Weekend French toast. Late-night grilled cheese.
The overnight rise fits perfectly into a normal schedule. Mix it before bed, shape it in the morning, bake it in the afternoon.
And that tender crumb? It stays fresh for days.
Give this recipe a try. Your sandwiches will never be the same.